Device | PROPERTIES
This page is used to view and edit existing properties for the device, and create new properties as needed. Notice, in the following example, that the high-level identification and connection status on the device and the navigational panel for device details remains visible.
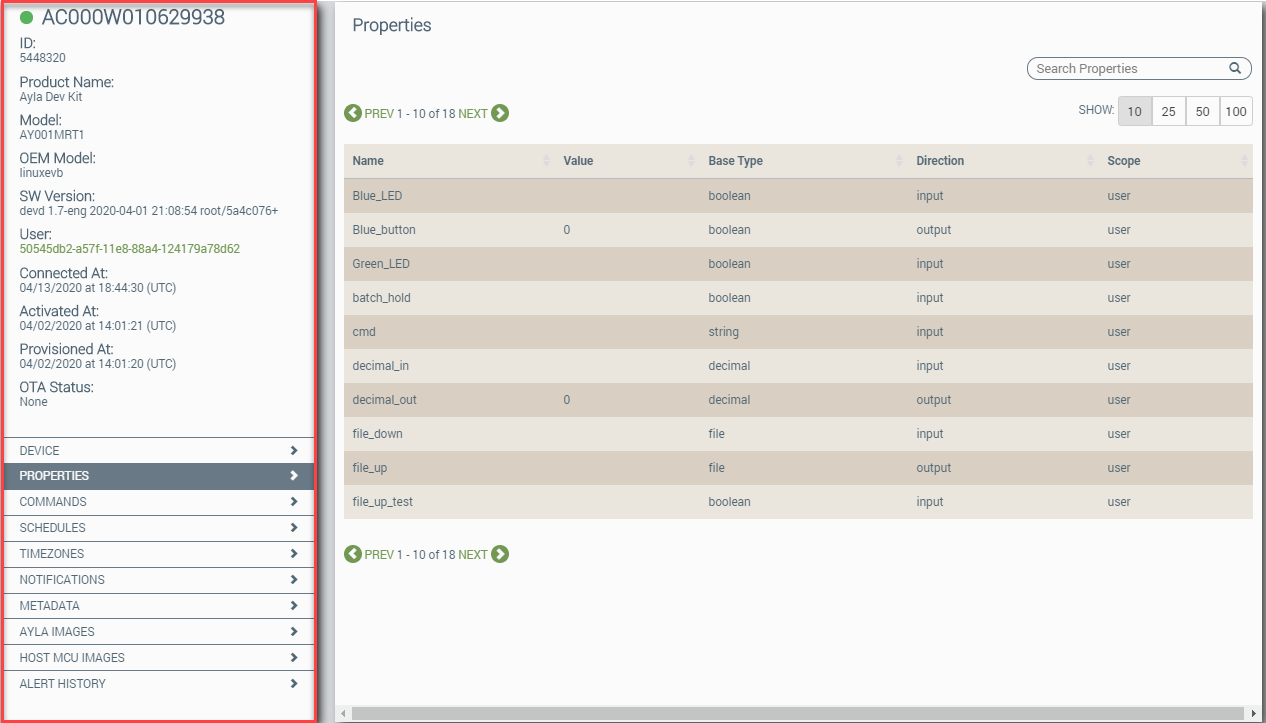
The information below is provided on this page:
- Name - the name of the property
- Value - the default value of the property
- Base Type - the type of property, i.e. integer, string, boolean, decimal, file, message
- Direction - the direction property value changes - input, output
- Scope - the roles of those who can see the property - user, oem, etc.
- Trash Can icon - used to delete that device property from the dashboard
You can accomplish the following from this page:
- Click the property you wish to review to open the Property page (example shown below).
|
NOTE |
Use the search properties tool (upper right corner of the Properties page) if you cannot quickly find the property you wish to change. See the example below. |

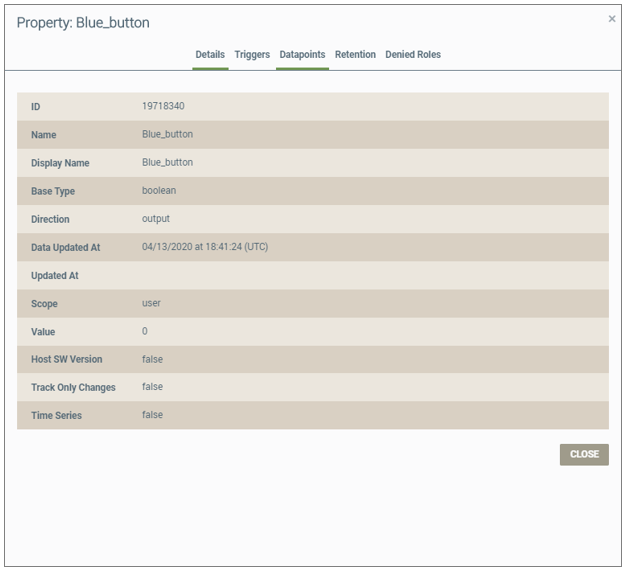
Following are descriptions of the fields:
- ID (review only)- the property ID that was automatically assigned by the Ayla service.
- For Name, change the name of the property.
|
NOTE |
The maximum limit is 27 characters. The first character must be alphabetic. Upper/lower case letters, numbers, hyphens, and underscores are allowed. No spaces or special characters are allowed. |
- Display Name - the screen name.
- Base Type
integer (numeric value)
string (set of alphanumeric characters)
boolean (true or false)
decimal (for decimal numeric value)
float (decimal numeric value with limited range)
file (which is a file that you attach)
message (large strings with a maximum size of 512 KB) - the setting for this property's data type.
- MIME Typeapplication/json (lightweight, text-based, language-independent data interchange)
application/octet-stream (binary file) text/plain (plain text file) - the standard data interchange format setting. This field only shows when the base type is set to "message." - Direction - either of the following options:
Input (allows both the Ayla-enabled device and Third-Party Application API Client to update a given device property)
Ouput (only allows the Ayla-enabled device to update a given device property)
- Date Updated At - the last time device was updated with this property.
- Updated At - the date when the property was updated.
- Scope - either of the following options:
user (user and Ayla customer sees the property)
- oem (only the Ayla customer sees property)
- Value - the default value of the property.
- Host SW Version - selected if the host software version affects this property.
- Track Only - selected if the log should track changes to this property.
- Time Series - when selected queues datapoints to the device if the device disconnects (upon reconnection, datapoints are sent.)
- Click CLOSE.
- Click the property entry to open the Property page.
|
NOTE |
Use the search properties tool (upper right corner of the Properties page) if you cannot quickly find the property you wish to change. See the example below. |
- Click the Triggers tab.
|
NOTE |
Use the search triggers tool (upper right corner of the Properties page) if you cannot quickly find the trigger you wish to review. See the example below. |

- Review the following information on this page:
- Device Nickname (a user-friendly device name)
- Property Nickname (a user-friendly property name)
- Trigger Type:
- always (The trigger is always active.)
- compare_absolute (The trigger is compared against a set value.)
- compare_service
- on_change (The trigger is activated only upon a change.)
- Compare Type (==, >, <, >=, or <=)
- Value (the value used to activate the trigger)
- Period (the time period allowed for the trigger)
- User ID (the user name associated with the device)
- Active (the status of the trigger)
- Trash can icon (used to delete a trigger)
- Click the property to open the Property page.
|
NOTE |
Use the search properties tool (upper right corner of the Properties page) if you cannot quickly find the property you wish to change. See the example below. |
- Click the Triggers tab.
- Click the CREATE A TRIGGER button to open the New Trigger dialog box (shown below).
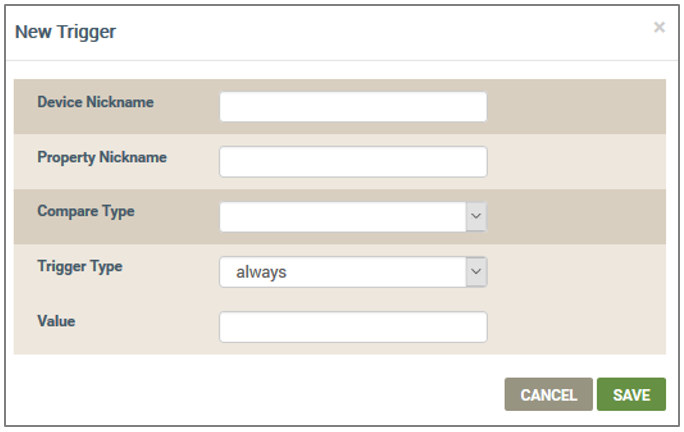
- Enter the parameters for each field as follows:
- For Device Nickname, enter the user-friendly device name.
- For Property Name, enter the user-friendly property name.
- For Compare Type, select ==, >, <, >=, or <= in the drop-down menu.
- For Trigger Type, select one of the following from the drop-down menu:
- always (The trigger is always active.)
- compare_absolute (The trigger is compared against a set value.)
- on_change (The trigger is activated only upon a change.)
- compare_service
- For Value, enter the value used to activate the trigger.
- Click SAVE.
- Click the property to open the Property page.
|
NOTE |
Use the search properties tool (upper right corner of the Properties page) if you cannot quickly find the property you wish to change. See the example below. |
- Click the Triggers tab.
- Click the the trigger you wish to edit, which opens another page for the trigger, shown below. Notice that there are two tabs on this page: Details and Trigger Apps.
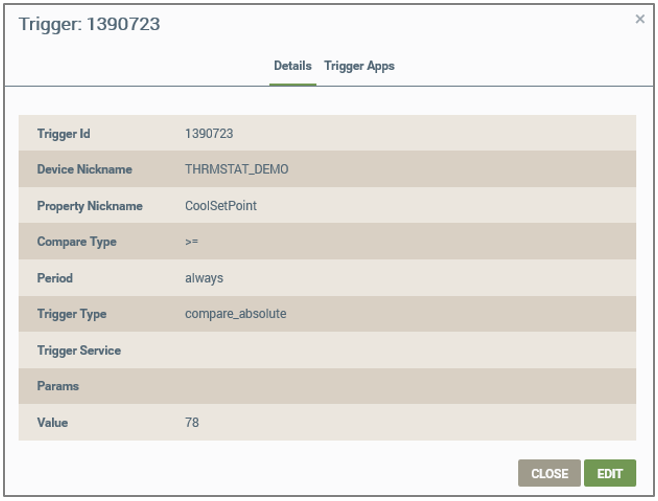
- Click the EDIT button.
- Edit the fields on the Details tab as follows:
- Trigger ID (for review only) - automatically assigned by the Ayla service.
- For Device Nickname (for review only), the user-friendly property name entered when creating the property.
- For Property Nickname (for review only) - the screen name entered when creating the property.
- For Compare Type, select ==, >, <, >=, or <= in the drop-down menu.
- For Trigger Type, change to one of the following from the drop-down menu:
- always (The trigger is always active.)
- compare_absolute (The trigger is compared against a set value.)
- on_change (The trigger is activated only upon a change.)
- compare_service
- Trigger Service(for review only)
- Params (for review only)
- For Value, change to the value used to activate the trigger.
- Click UPDATE.
- Click the property to open the Property page.
|
NOTE |
Use the search properties tool (upper right corner of the Properties page) if you cannot quickly find the property you wish to change. See the example below. |
- Click the Triggers tab.
- Click the entry for the trigger to open the Trigger page, shown below:
- Click the Trigger Apps tab.
- Click CREATE AN APPLICATION to open the New Application dialog box, shown below:
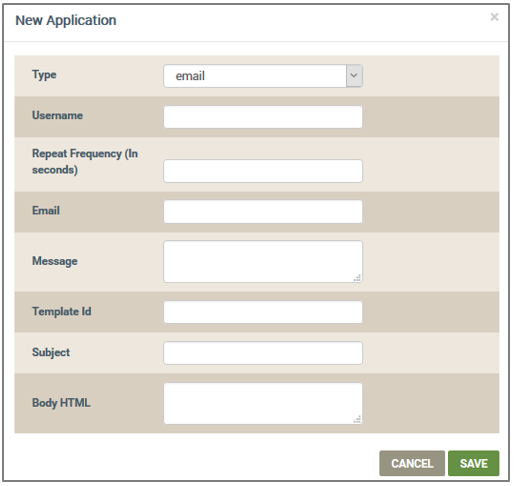
- For Type, select the notification type in the drop-down list and enter the required data as follows:
|
NOTE |
The fields in this dialog box change for each notification type option. |
- For email, enter the following data:
- Username -The greeting in the notification message.
- Repeat Frequency - The seconds between repeat of this trigger application.
- Country Code - The country phone code.
- Phone number
- Message - The message that will be sent.
- Template ID - The ID of the template to use with this application.
- Subject - The subject line for the email sent.
- Body HTML - Any additional details formatted in HTML code.
- For sms, enter the following data:
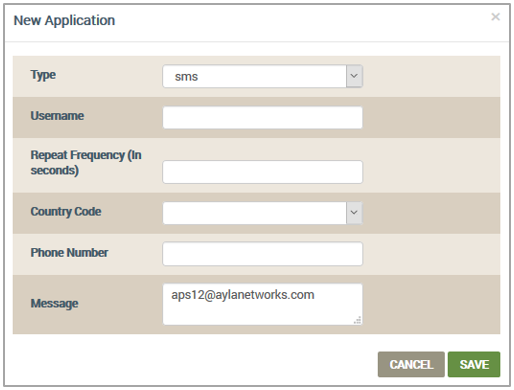
- Username -The greeting in the notification message.
- Repeat Frequency - The seconds between repeat of this trigger application.
- Country Code - The country phone code.
- Phone number
- For foward, enter the following data:
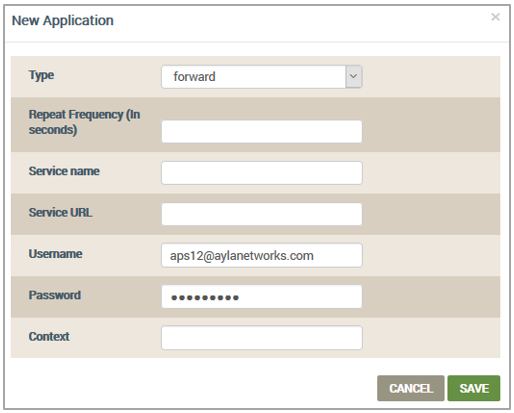
- Repeat Frequency - The seconds between repeat of this trigger application.
- Service name- The name of the forwarding service.
- Service URL - The URL to which the notification is sent.
- Username - The username for the application.
- Password - The password for the username.
- Context - The message forwarded.
- For push_baidu, enter the following data:
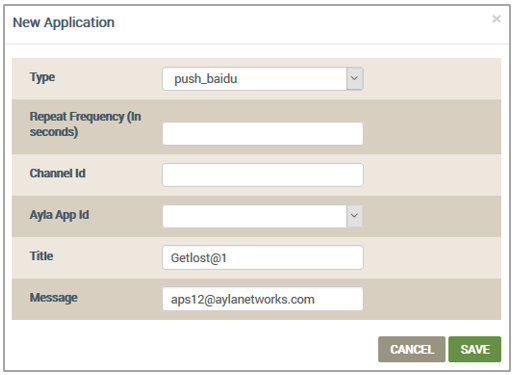
- Repeat Frequency - The seconds between repeat of this trigger application.
- Channel Id- The ID of the Baidu channel.
- Ayla App Id - The ID of the available Ayla apps.
- Title - The title name of the notification.
- Message - The message that will be sent.
- For push_ios, enter the following data:

- Repeat Frequency - The seconds between repeat of this trigger application.
- Registration Id- The ID of the registration.
- Ayla App Id - The ID of the available Ayla apps.
- Message - The message that will be sent.
- Sound File Name - The sound to play when the message is received by the iOS device.
- Data - The information to include in the notification.
- For push_android, enter the following data:
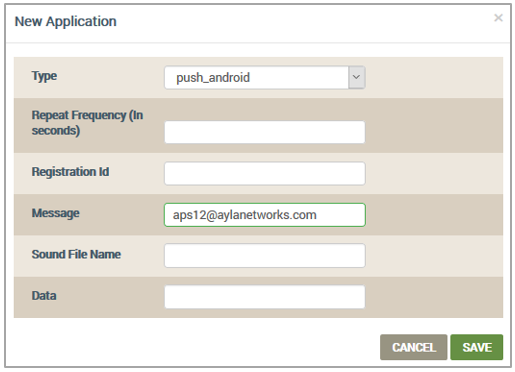
- Repeat Frequency - The seconds between repeat of this trigger application.
- Registration Id- The ID of the registration.
- Ayla App Id - The ID of the available Ayla apps.
- Sound File Name - The sound to play when the message is received by the iOS device.
- Data - The information to include in the notification.
- Click SAVE.
- Click the property to open the Property page.
|
NOTE |
Use the search properties tool (upper right corner of the Properties page) if you cannot quickly find the property you wish to change. See the example below. |
- Click the Triggers tab.
- Click the entry for the trigger to open the Trigger page, shown below:
- Click the Trigger Apps tab.
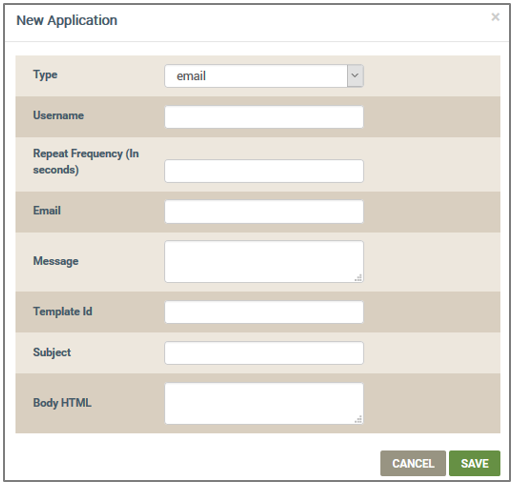
- Click the trigger application you wish to edit to open the Application dialog box. Following is an example of the Application dialog box for an email app:
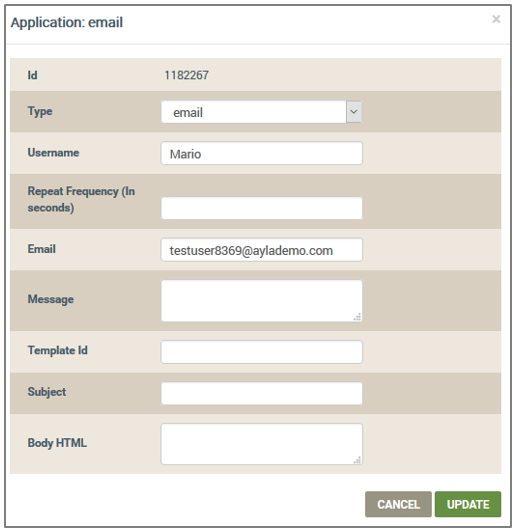
- Edit the settings for the trigger notification app as follows:
- For email, edit the fields described below:
- Username -The greeting in the notification message.
- Repeat Frequency - The seconds between repeat of this trigger application.
- Country Code - The country phone code.
- Phone number
- Message - The message that will be sent.
- Template ID - The ID of the template to use with this application.
- Subject - The subject line for the email sent.
- Body HTML - Any additional details formatted in HTML code.
- For sms (shown below), edit the fields described below:
- Username -The greeting in the notification message.
- Repeat Frequency - The seconds between repeat of this trigger application.
- Country Code - The country phone code.
- Phone number
- For foward (shown below), edit the fields described below:
- Repeat Frequency - The seconds between repeat of this trigger application.
- Service name- The name of the forwarding service.
- Service URL - The URL to which the notification is sent.
- Username - The username for the application.
- Password - The password for the username.
- Context - The message forwarded.
- For push_baidu (shown below), edit the fields described below:
- Repeat Frequency - The seconds between repeat of this trigger application.
- Channel Id- The ID of the Baidu channel.
- Ayla App Id - The ID of the available Ayla apps.
- Title - The title name of the notification.
- Message - The message that will be sent.
- For push_ios (shown below), edit the fields described below:
- Repeat Frequency - The seconds between repeat of this trigger application.
- Registration Id- The ID of the registration.
- Ayla App Id - The ID of the available Ayla apps.
- Message - The message that will be sent.
- Sound File Name - The sound to play when the message is received by the iOS device.
- Data - The information to include in the notification.
- For push_android (shown below), edit the fields described below:
- Repeat Frequency - The seconds between repeat of this trigger application.
- Registration Id- The ID of the registration.
- Ayla App Id - The ID of the available Ayla apps.
- Sound File Name - The sound to play when the message is received by the iOS device.
- Data - The information to include in the notification.
- Click UPDATE.
- Click the property to open the Property page.
|
NOTE |
Use the search properties tool (upper right corner of the Properties page) if you cannot quickly find the property you wish to change. See the example below. |
- Click the Datapoints tab. The information in the table at the bottom of this page is as follows:
- Created At Device (UTC) - The date/time that the datapoint was generated in the device. This is only used for batch datapoints generated for the device.
- Created At Cloud (UTC) - The date/time that the datapoint was generated in the Ayla Cloud.
- Updated At Cloud (UTC) - For file properties, this is the date/time that the file is uploaded after the initial file property datapoint is created in the Ayla Cloud. For all other device property base types (boolean, integer, decimal, string, and message), the timestamp is the same as in the Created At Cloud (UTC) column.
- Value - the value of the property datapoint. For example, for a file property datapoint, this is a location URL.
- Search datapoints in the Time Range section as follows:
- In the From (UTC) field, select the date (in the calendar that pops up) to specify the beginning date in the time range for the datapoints you wish to find.
- In the To (UTC) field, select the date (in the calendar that pops up) to specify the end date in the time range for the datapoints for which you are searching.
- Click the SEARCH button.
- To review the settings for a datapoint, click the datapoint in the table to open the Details dialog box, shown below:
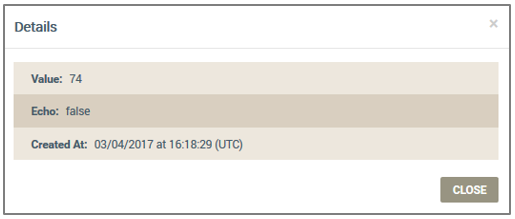
- Click CLOSE.
- Click the property to open the Property page.
|
NOTE |
Use the search properties tool (upper right corner of the Properties page) if you cannot quickly find the property you wish to change. See the example below. |
- Click the Datapoints tab.
- Click the CREATE DATAPOINT button to open the Create Datapoint dialog box, shown below:
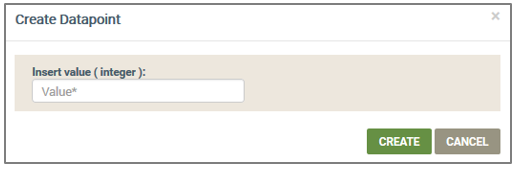
- Enter the value.
- Click the CREATE button.
- Click the property to open the Property page.
|
NOTE |
Use the search properties tool (upper right corner of the Properties page) if you cannot quickly find the property you wish to change. See the example below. |
- Click the Retention tab to view the days value setting.
- Click the CANCEL button.
- Click the property to open the Property page.
|
NOTE |
Use the search properties tool (upper right corner of the Properties page) if you cannot quickly find the property you wish to change. See the example below. |
- Click the Denied Roles tab. The information in the table on this page is as follows:
- Role (the role that was denied)
- Operation (the operation that was denied)
See also:Devices.
How to get here on the dashboard:
- Click Devices in the navigation panel.
- Click the device in the table listing to open the Device page.
- Click PROPERTIES in the menu on the lower left side.
Please click here to let us know how we're doing. Thank you.